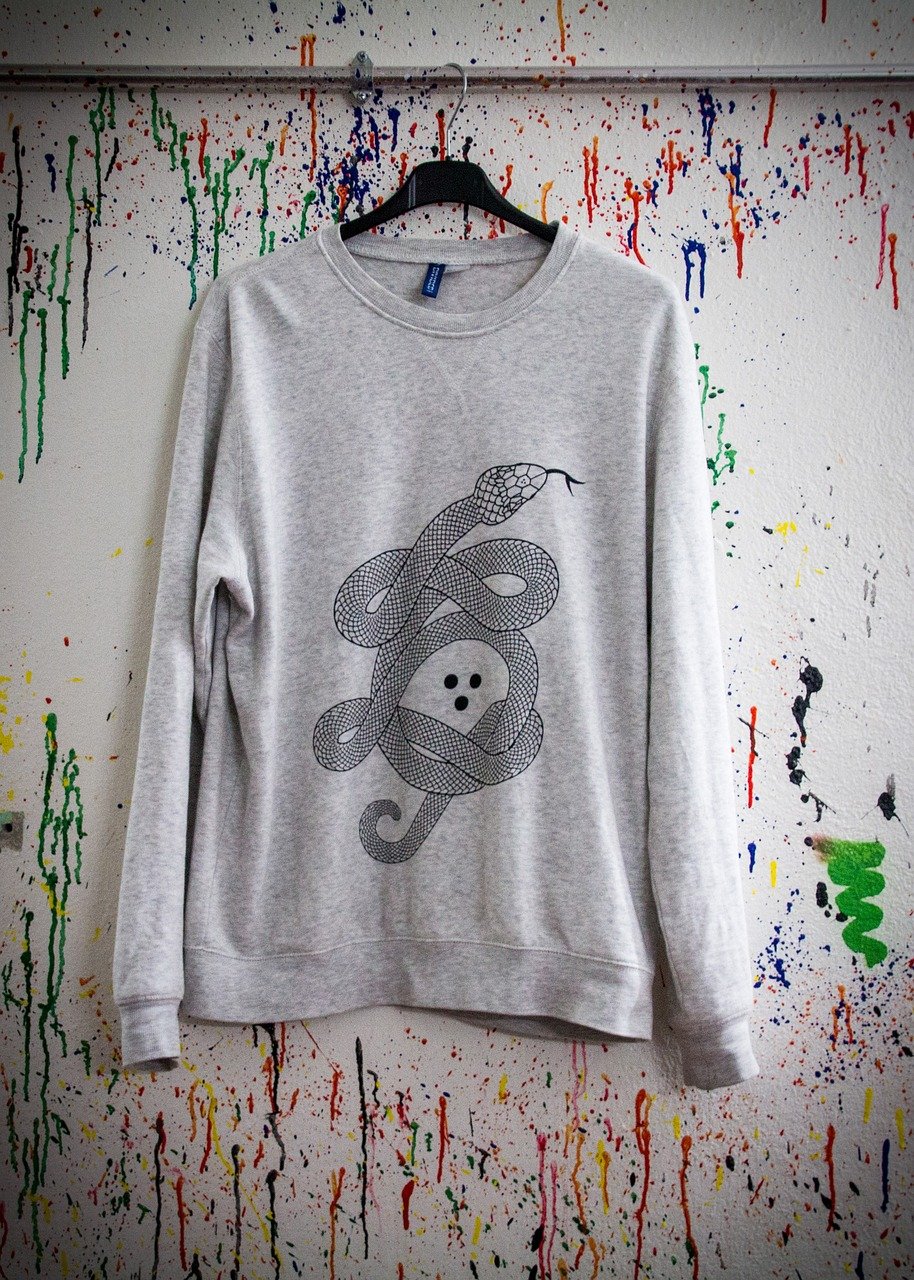
Direct to film powder plays a crucial role in direct to film printing, acting as an adhesive powder that binds your design to the fabric. This powder ensures your dtf transfers remain vibrant and durable, even after multiple washes. Proper application and curing are essential for achieving high-quality results. Uneven powder or insufficient curing can lead to peeling or dull prints. By following the correct steps, you can create flawless direct-to-film transfers that stand out on any fabric. Whether you’re new to dtf printing or looking to improve, mastering these techniques will elevate your designs.
Explore more about DTF powder here.
Key Takeaways
Use high-quality DTF powder, film, and ink to ensure vibrant colors and strong adhesion for durable prints.
Always mirror your design before printing to avoid reversed images or text on the final transfer.
Apply DTF powder evenly over the wet print and shake off excess to prevent clumping and ensure a smooth finish.
Cure the DTF powder according to manufacturer instructions to achieve a glossy adhesive layer that bonds well to fabric.
Regularly calibrate your heat press for accurate temperature and pressure settings to avoid scorching or weak adhesion.
Perform test prints on scrap fabric to fine-tune your settings and ensure optimal results before full production.
Store DTF materials in a cool, dry place to maintain their quality and prevent moisture-related issues.
Materials Needed for Direct to Film Printing
To achieve the best results with direct to film printing, you need the right tools and materials. Each item plays a specific role in ensuring your designs are vibrant, durable, and professional-looking. Let’s break down the essentials and optional tools that can enhance your DTF printing experience.
Essential Tools for DTF Transfers
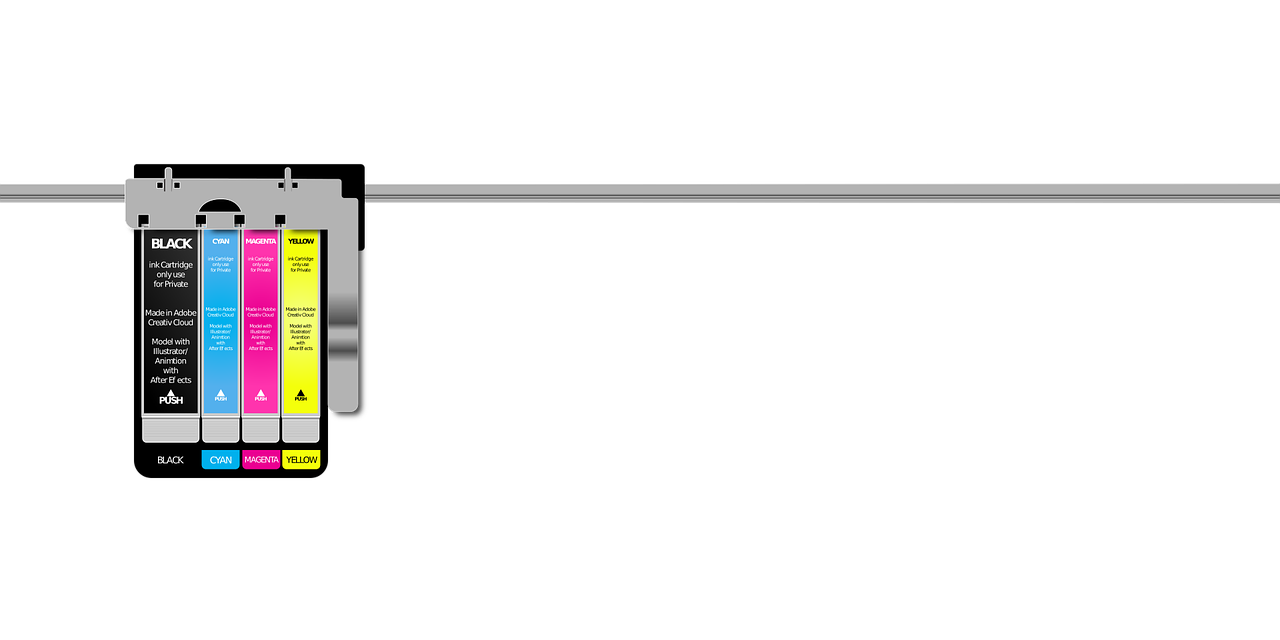
DTF printer and compatible ink
A DTF printer is the backbone of the entire process. It prints your design onto a special transfer film, ensuring every detail is captured. Pair it with compatible DTF ink to achieve vibrant colors and sharp details. The ink must work seamlessly with the printer and powder to ensure proper adhesion and durability. This compatibility, often referred to as ink and powder compatibility, is crucial for flawless transfers.
DTF film (ensure the matte side is facing forward)
The DTF film serves as the canvas for your design. Always load the film with the matte side facing forward to ensure the ink adheres correctly. This step is vital for achieving crisp and accurate prints. Using high-quality film ensures better results and reduces the chances of smudging or errors during printing.
DTF powder
DTF powder acts as the adhesive that binds your design to the fabric. After printing, you’ll sprinkle the powder over the wet ink. It’s essential to apply it evenly and shake off any excess. This ensures proper adhesion and prevents clumping, which can affect the final look of your transfer. For darker fabrics, black DTF powder is often recommended for better blending.
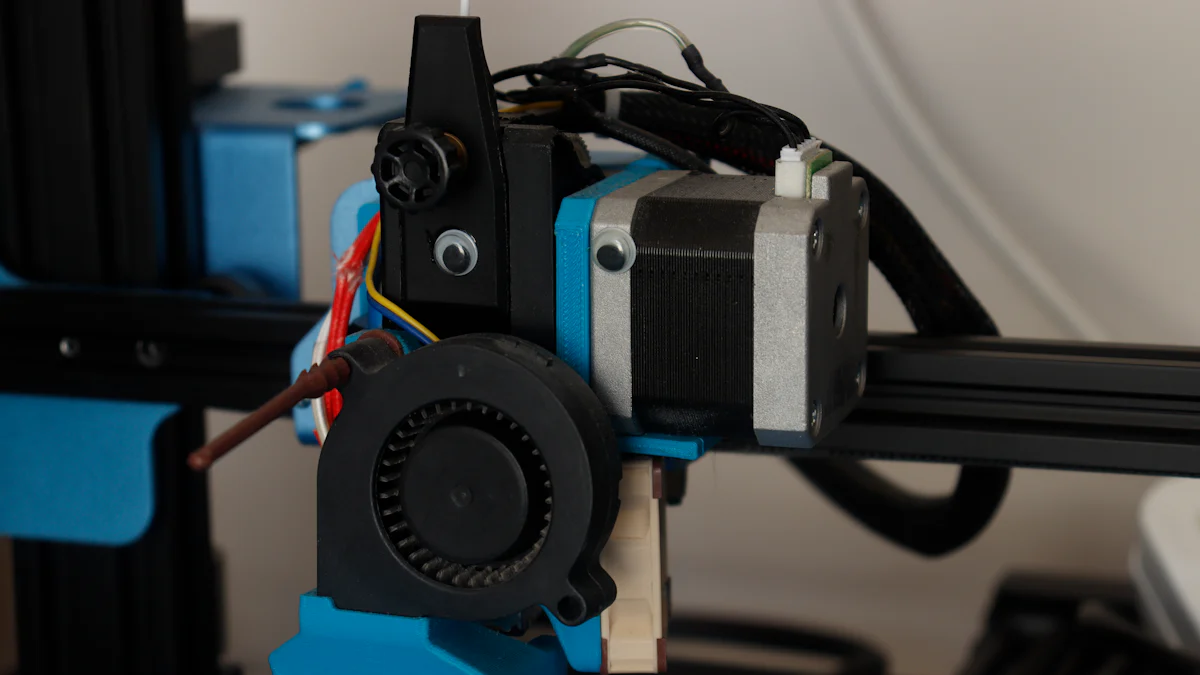
Heat press machine
A heat press machine is indispensable for transferring your design from the film to the fabric. It applies the necessary heat and pressure to melt the powder and bond the design to the material. Precise temperature and pressure settings are key to achieving a smooth and durable finish.
Curing oven or heat gun
Curing the powder is a critical step in the DTF process. A curing oven or heat gun helps melt the powder into a glossy, adhesive layer. This step ensures the design adheres properly to the fabric during the heat press stage. Follow the manufacturer’s instructions for temperature and curing time to avoid under-curing or over-curing.
Optional Tools for Enhanced Results
Anti-static brush for smooth application
An anti-static brush can help you achieve a smoother application of DTF powder. It removes static electricity from the film, preventing powder from sticking unevenly. This tool is especially useful when working on intricate designs or fine details.
Digital thermometer for precise temperature control
A digital thermometer ensures your heat press and curing equipment maintain consistent temperatures. Accurate temperature control is essential for preventing issues like under-cured powder or scorched fabric. This tool gives you peace of mind, knowing your settings are spot-on.
By gathering these tools and materials, you’ll set yourself up for success in the DTF printing process. Whether you’re just starting or looking to refine your technique, having the right equipment makes all the difference. For more tips and high-quality supplies, check out our website.
Step-by-Step Guide to Using DTF Powder
Mastering the step-by-step process of using direct to film powder is essential for achieving professional results in dtf printing. Each stage plays a critical role in ensuring your designs are vibrant, durable, and adhere perfectly to the fabric. Let’s dive into the details.
Preparing the Design for DTF Transfers
Mirror the design before printing.
Always mirror your design before printing. This ensures that when you transfer it onto the fabric, the orientation appears correct. Forgetting this step can lead to reversed text or images, which can ruin your project.
Use high-resolution images for sharp and vibrant results.
High-resolution images are key to achieving optimal print quality. Low-resolution files often result in blurry or pixelated prints. Aim for at least 300 DPI (dots per inch) to ensure your design looks sharp and professional.
Adjust color settings for optimal output.
Fine-tune your printer’s color settings to match the design’s intended look. This step helps you achieve vibrant and accurate colors. Using high-quality dtf inks also enhances the final output, making your designs pop on any fabric.
Printing on DTF Film
Load the DTF film correctly into the printer.
Place the dtf film into the printer with the matte side facing forward. This ensures the ink adheres properly to the film. Misloading the film can lead to smudges or uneven prints, so double-check its alignment before starting.
Use the appropriate print settings for your printer and film.
Adjust your printer settings to match the type of dtf film you’re using. Select the correct resolution and speed for your project. Slower speeds often yield better results by allowing the ink to settle evenly on the film.
Pro Tip: Keep your printer’s printhead clean and calibrated. This prevents issues like streaks or blurring, ensuring every detail of your design is captured.
Applying Direct to Film Powder
Evenly sprinkle the DTF powder over the wet print.
After printing, immediately begin applying dtf powder to the wet ink. Sprinkle the powder evenly across the design to ensure full coverage. Uneven application can lead to weak adhesion or patchy transfers.
Shake off excess powder to ensure uniform application.
Gently shake the film to remove any excess powder. This step is crucial in the powder application process, as leftover clumps can affect the final look of your transfer. A smooth, even layer of dtf powder ensures the design adheres seamlessly to the fabric.
Did You Know? Using finer direct to film powder can result in thinner, softer transfers that feel more natural on the fabric.
By following these steps, you’ll set yourself up for success in direct to film printing. Each stage, from preparing your design to the powder application process, contributes to the overall quality of your transfer. For premium supplies and expert tips, visit our website.
Curing the DTF Powder
Curing the powder is a critical step in the step-by-step process of creating a flawless DTF transfer. This stage ensures the adhesive powder melts into a smooth, glossy layer, ready to bond your design to the fabric. Follow these steps to get it right:
Set the curing temperature and time based on the powder manufacturer’s instructions.
Every DTF powder has specific curing requirements. Check the manufacturer’s guidelines for the ideal temperature and time. Typically, curing temperatures range between 250°F and 300°F, but always confirm to avoid under-curing or over-curing. Under-curing can result in weak adhesion, while over-curing may scorch the powder, affecting the final print quality.
Use a curing oven or heat gun to melt the powder until it forms a smooth, glossy layer.
Place the printed film with the applied powder into a curing oven or use a heat gun for this step. Ensure the heat is evenly distributed across the film. Watch closely as the powder melts and transforms into a shiny, uniform layer. This glossy finish indicates that the powder is fully cured and ready for the next step. Uneven curing can lead to patchy transfers, so take your time to ensure consistency.
Pro Tip: Keep your workspace free from dust or debris during curing. Contaminants can stick to the melted powder and ruin the final design.
Transferring the Design to Fabric
Once the powder is cured, it’s time to move on to transferring the design to your chosen fabric. This step brings your artwork to life, so precision is key.
Preheat the fabric to remove moisture and wrinkles.
Before applying a DTF transfer, preheat the fabric using your heat press. This removes any moisture and smooths out wrinkles, creating a clean surface for the transfer. Skipping this step can lead to uneven adhesion or bubbling under the design.
Place the cured DTF film on the fabric and press with the heat press.
Position the cured DTF film on the fabric with the design facing down. Use your heat press to apply consistent pressure and heat. This step activates the adhesive layer, bonding the design securely to the fabric. Ensure the film stays in place during pressing to avoid misalignment.
Follow the recommended temperature, pressure, and time settings.
Check the DTF powder and film manufacturer’s instructions for the correct settings. Most transfers require temperatures between 300°F and 350°F, medium pressure, and a pressing time of 10-15 seconds. Adjust your heat press accordingly to achieve the best results. Accurate settings are crucial for heat pressing the design effectively.
Peel the film (hot or cold peel, depending on the DTF powder type).
After pressing, carefully peel the film away from the fabric. Some powders require a hot peel, meaning you remove the film immediately while it’s still warm. Others need a cold peel, where you wait for the film to cool completely before peeling. Follow the specific instructions for your DTF powder to avoid damaging the transfer.
Did You Know? The type of peel (hot or cold) can affect the finish of your design. Hot peels often result in a matte look, while cold peels can give a glossier finish.
By mastering the art of curing a DTF transfer and transferring the design, you’ll achieve vibrant, durable prints that stand out. For premium DTF supplies and expert advice, visit our website.
Tips for Achieving the Best Results with DTF Powder
Achieving flawless dtf transfers requires more than just following the step-by-step process. You need to focus on the quality of your materials, maintain precise settings, and test your setup before diving into production. These tips will help you create high-quality prints that stand out.
Use High-Quality Materials
Invest in premium DTF powder, film, and ink for better durability and vibrant prints.
The foundation of optimal dtf printing lies in the materials you use. High-quality dtf powder, dtf film, and ink ensure your designs are vibrant and long-lasting. Premium hot melt adhesive powder provides strong adhesion, making your dtf transfers durable even after multiple washes. Cheap or low-grade materials often lead to dull colors, weak adhesion, and poor results. By investing in top-notch supplies, you set yourself up for success in direct-to-film printing.
Expert Insight: “To use DTF transfer adhesive well, it’s important to spread the powder evenly and keep it in the right storage conditions. This makes sure it sticks strongly when printing directly to film.” – DTF Printing Expert
For reliable and high-quality supplies, check out our website.
Maintain Consistent Temperature and Pressure
Regularly calibrate your heat press and curing equipment for accuracy.
Precision is key when working with direct to film powder. Your heat press technique must deliver consistent temperature and pressure to achieve a smooth and durable finish. Regularly calibrate your heat press and curing oven to ensure they operate at the correct settings. Inconsistent heat or pressure can lead to uneven adhesion or scorched designs.
Pro Tip: Stick to the recommended curing times and temperatures for your specific materials. Over-curing can scorch the adhesive powder, while under-curing weakens the bond.
Using a digital thermometer can help you monitor and maintain accurate temperatures during the curing and pressing stages. This small step can make a big difference in achieving high-quality prints.
Perform Test Prints
Test on scrap fabric to ensure settings are correct before final printing.
Before committing to a full batch, always test your setup on scrap fabric. This allows you to fine-tune your heat press technique, check the curing process, and ensure your design transfers perfectly. Testing helps you identify and fix issues like uneven powder application, incorrect temperature, or poor adhesion.
Did You Know? Testing also helps you evaluate the feel of the transfer. Finer hot melt adhesive powder creates thinner, softer transfers that feel more natural on fabric.
Taking the time to test ensures your final product meets your expectations. It’s a simple yet effective way to avoid costly mistakes and deliver high-quality designs.
By following these tips, you’ll elevate your dtf printing game and consistently achieve the best results. For more expert advice and premium supplies, visit our website.
Store DTF Powder and Film Properly
Keep materials in a cool, dry place to maintain their quality.
Proper storage of your DTF powder and film is essential for maintaining their effectiveness and ensuring consistent results. These materials are sensitive to environmental factors like humidity and temperature, which can compromise their quality if not stored correctly. Here’s how you can keep them in top condition:
Choose a cool, dry location: Store your DTF powder and film in an area with stable temperatures, ideally between 60°F and 75°F. Avoid places prone to extreme heat or cold, as these can degrade the adhesive properties of the powder and the integrity of the film.
Protect from moisture: Humidity is one of the biggest enemies of DTF materials. Moisture can cause the powder to clump, making it difficult to apply evenly. Use airtight containers or resealable bags to keep your powder and film dry. For added protection, consider placing silica gel packets in the storage container to absorb any excess moisture.
Avoid direct sunlight: Prolonged exposure to sunlight can weaken the adhesive quality of the powder and warp the film. Always store your materials in a shaded or dark space to prevent damage.
Expert Insight: “To use DTF transfer adhesive well, it’s important to spread the powder evenly and keep it in the right storage conditions. This makes sure it sticks strongly when printing directly to film.” – DTF Printing Expert
Keep away from contaminants: Dust, dirt, and other particles can stick to the powder or film, affecting the final print quality. Ensure your storage area is clean and free from debris to avoid contamination.
Label and organize your supplies: Clearly label your DTF powder and film with their purchase dates and specifications. This helps you track their shelf life and ensures you use older materials first, reducing waste.
Pro Tip: If you live in a humid climate, invest in a dehumidifier for your workspace or storage area. This small step can make a big difference in preserving the quality of your DTF materials.
By following these storage tips, you’ll extend the lifespan of your DTF powder and film, ensuring they perform at their best when you’re ready to use them. For premium-quality DTF supplies and more expert advice, visit our website.
Common Mistakes to Avoid in Direct to Film Printing
Mistakes in direct to film printing can lead to poor-quality results, wasted materials, and frustration. By understanding and avoiding these common pitfalls, you can ensure your dtf transfers are vibrant, durable, and professional-looking. Let’s explore the key mistakes and how to prevent them.
Uneven Application of DTF Powder
Uneven application of dtf powder is one of the most frequent errors in the process. When you apply the adhesive powder, clumps or thin spots can form if you’re not careful. These inconsistencies weaken the bond between the design and the fabric, leading to patchy or peeling transfers.
To avoid this, sprinkle the adhesive powder evenly over the wet print. Use a gentle hand to ensure full coverage without overloading the design. Afterward, shake off any excess powder by lightly tapping the film. This step ensures a smooth and uniform layer, which is essential for achieving flawless dtf transfers.
Pro Tip: Finer adhesive powder creates thinner, softer transfers that feel more natural on fabric. It’s worth investing in high-quality powder for better results.
Skipping the Curing Step
Curing the adhesive powder is a non-negotiable step in direct to film printing. If you skip this step or don’t cure the powder properly, the design won’t adhere to the fabric as it should. This can result in peeling, cracking, or even complete transfer failure after washing.
Always follow the manufacturer’s instructions for curing temperature and time. Use a curing oven or heat gun to melt the powder until it forms a smooth, glossy layer. Watch closely to ensure the powder cures evenly across the entire design. Proper curing guarantees that your dtf transfers remain vibrant and durable, even after multiple washes.
Did You Know? High-quality materials, including adhesive powder, play a significant role in the durability of your prints. Poor-quality powders may not cure properly, leading to weak adhesion.
Incorrect Heat Press Settings
Incorrect heat press settings can ruin an otherwise perfect transfer. Using the wrong temperature, pressure, or pressing time can scorch the adhesive powder, cause uneven adhesion, or fail to bond the design to the fabric.
To avoid this, always refer to the recommended settings provided by the manufacturer of your materials. Most dtf transfers require medium pressure, temperatures between 300°F and 350°F, and a pressing time of 10-15 seconds. Double-check your heat press calibration to ensure it delivers consistent results. Accurate settings are crucial for achieving a smooth and professional finish.
Expert Insight: Consistency is key. Regularly calibrate your heat press to maintain precise temperature and pressure. This small step can make a big difference in the quality of your transfers.
By steering clear of these common mistakes, you’ll save time, reduce waste, and produce high-quality dtf transfers that stand out. For premium supplies and expert advice, visit our website.
Using Low-Quality Materials
Poor-quality powder or film can result in weak adhesion and dull prints.
The materials you choose for DTF printing directly impact the quality of your final product. Using low-quality powder or film often leads to disappointing results. Weak adhesion is one of the most common issues. The design may not stick properly to the fabric, causing it to peel or crack after just a few washes. This can ruin the durability of your prints and leave your customers dissatisfied.
Low-quality materials also affect the vibrancy of your designs. Instead of bold, eye-catching colors, you might end up with dull and faded prints. The details in your artwork could appear blurry or smudged, making your designs look unprofessional. For example, poor-quality DTF powder often clumps during application, creating uneven layers that compromise the final appearance.
“High-quality DTF prints offer vibrant colors, sharp details, and excellent durability, while low-quality prints often fade, crack, or lack clarity.”
To avoid these issues, always invest in premium materials. High-quality DTF powder ensures smooth application and strong adhesion. It helps your designs withstand wear and washing without losing their vibrancy. Similarly, using top-grade DTF film guarantees better ink absorption and sharper details. These materials work together to produce professional-grade prints that stand out.
Here’s why high-quality materials matter:
Vibrant Colors: Premium powders and films enhance color accuracy, making your designs pop.
Durability: High-quality materials resist fading and cracking, even after multiple washes.
Sharp Details: Superior films capture every fine detail, ensuring your artwork looks crisp and clear.
Pro Tip: Always check the specifications of your materials before purchasing. Look for products designed specifically for DTF printing to ensure compatibility and optimal results.
By choosing the right materials, you’ll save time, reduce waste, and deliver prints that impress. Don’t let low-quality supplies hold you back. For reliable and premium DTF powders and films, visit our website.
Troubleshooting Common Issues in DTF Transfers
Even with the best tools and preparation, challenges can arise during dtf printing. Whether your design isn’t sticking, colors look dull, or powder clumps during application, these issues can disrupt your workflow. Let’s tackle these common problems and explore practical solutions to keep your dtf transfers flawless.
Design Not Sticking to Fabric
When your design doesn’t adhere to the fabric, it’s often due to incomplete curing or incorrect heat press settings. Here’s how you can fix it:
Check if the DTF powder was fully cured.
Curing the dtf powder is a critical step in direct to film printing. If the powder isn’t fully cured, the adhesive layer won’t bond properly to the fabric. Make sure you follow the manufacturer’s instructions for curing temperature and time. Typically, curing requires temperatures between 250°F and 300°F. Use a curing oven or heat gun to melt the powder into a smooth, glossy layer. This ensures the adhesive is ready to stick firmly during the heat press stage.
Pro Tip: Keep your workspace clean and free of dust during curing. Contaminants can interfere with the adhesive layer and weaken the bond.
Verify heat press settings for accuracy.
Incorrect heat press settings can also cause adhesion problems. Double-check the temperature, pressure, and pressing time recommended for your materials. Most dtf transfers require medium pressure, temperatures between 300°F and 350°F, and a pressing time of 10-15 seconds. Regularly calibrate your heat press to ensure it delivers consistent results. Accurate settings are essential for bonding the design securely to the fabric.
Did You Know? A digital thermometer can help you monitor your heat press temperature for precision. This small tool can make a big difference in achieving professional results.
Print Colors Appear Dull
Dull colors can ruin the vibrancy of your dtf transfers. This issue often stems from low-resolution designs, poor color settings, or subpar materials. Here’s how to bring your prints to life:
Ensure the design resolution and color settings are optimized.
Start by using high-resolution images for your designs. Aim for at least 300 DPI (dots per inch) to ensure sharp and vibrant prints. Adjust your printer’s color settings to match the intended look of your design. Fine-tuning these settings helps you achieve accurate and bold colors during dtf printing.
Use high-quality ink and film.
The quality of your materials directly impacts the final output. Invest in premium dtf film and ink to enhance color vibrancy and detail. High-quality ink ensures smooth application and prevents streaks or fading. Similarly, superior dtf film captures every detail of your design, making your prints stand out. Avoid cutting corners with cheap materials, as they often lead to dull and unprofessional results.
“High-quality materials are the backbone of vibrant and durable dtf transfers.”
Powder Clumping During Application
Clumping adhesive powder can create uneven layers, affecting the final look of your transfers. Moisture is often the culprit behind this issue. Here’s how to prevent it:
Store DTF powder in a dry environment to prevent moisture absorption.
Proper storage is essential for maintaining the quality of your adhesive powder. Keep the powder in its original, airtight container and store it in a cool, dry place. Avoid exposing it to high humidity, as moisture can cause clumping and reduce adhesion. For added protection, use silica gel packets in the storage container to absorb excess moisture.
Pro Tip: Label your powder container with the purchase date and expiration date. Most high-quality powders have a shelf life of around 12 months when stored correctly.
By following these steps, you’ll ensure your dtf powder remains in top condition, ready to deliver smooth and even application every time.
Troubleshooting these common issues will help you master the art of direct-to-film printing. Whether it’s perfecting your curing process, optimizing your color settings, or storing your materials properly, each step contributes to achieving flawless dtf transfers. For premium supplies and expert advice, visit our website.
Mastering the use of direct to film powder requires attention to detail and practice. Focus on applying the powder evenly, curing it properly, and transferring your designs with precision. High-quality materials and accurate settings play a vital role in achieving the best results. Experiment with different techniques and refine your process to create flawless dtf transfers. With dedication, you’ll produce vibrant, durable designs that stand out. Ready to elevate your direct-to-film printing? Explore premium supplies and expert tips at our website.
FAQ
What is DTF powder, and why is it important?
DTF powder is an adhesive material that binds your printed design to the fabric. It plays a crucial role in ensuring your transfers are durable and vibrant. Without proper application of DTF powder, your designs may peel, crack, or fail to adhere properly to the fabric.
Can I use any type of film for DTF printing?
No, not all films are suitable for DTF printing. Low-quality films often result in unclear prints and poor adhesion. Always choose high-quality DTF films to ensure vibrant colors and strong bonding. Using premium films also reduces the chances of smudging or errors during the printing process.
Why do my prints look dull after transferring?
Dull prints can occur due to several reasons:
Using low-resolution images or poor-quality ink.
Incorrect printer color settings.
Low-grade DTF film that doesn’t absorb ink properly.
To fix this, use high-resolution designs (at least 300 DPI), adjust your printer’s color settings, and invest in premium ink and film. These steps will help you achieve vibrant and sharp prints.
How do I prevent the powder from clumping during application?
Clumping usually happens when the DTF powder absorbs moisture. To avoid this:
Store the powder in a cool, dry place.
Use airtight containers to protect it from humidity.
Add silica gel packets to the storage container for extra moisture control.
Proper storage ensures smooth application and consistent results.
What happens if I skip the curing step?
Skipping the curing step can lead to weak adhesion between the design and the fabric. This may cause the design to peel or crack after washing. Always cure the powder by following the manufacturer’s recommended temperature and time. Curing transforms the powder into a glossy adhesive layer, ensuring a strong bond.
How do I know if my heat press settings are correct?
Check the recommended temperature, pressure, and time for your materials. Most DTF transfers require medium pressure, temperatures between 300°F and 350°F, and a pressing time of 10-15 seconds. Regularly calibrate your heat press to maintain accuracy. Incorrect settings can weaken the bond or scorch the design.
Why is my design not sticking to the fabric?
If your design isn’t adhering, it could be due to:
Incomplete curing of the DTF powder.
Incorrect heat press settings.
Poor-quality adhesive powder or film.
Ensure the powder is fully cured into a glossy layer before pressing. Double-check your heat press settings and use high-quality materials for better results.
Can I use cheap inks for DTF printing?
Using cheap inks can harm your printer and compromise print quality. Low-quality inks may clog the printhead or cause nozzle issues, leading to costly repairs. Invest in premium inks, especially white ink, to prevent clogging and ensure vibrant, long-lasting prints.
How should I store my DTF powder and film?
Store your DTF powder and film in a cool, dry place away from direct sunlight. Use airtight containers to protect them from moisture and contaminants. Proper storage maintains their quality and ensures consistent performance during printing.
What fabrics work best for DTF transfers?
DTF transfers work well on a variety of fabrics, including cotton, polyester, and blends. However, avoid using cheap fabrics as they may lose their shape and affect the print quality. High-quality fabrics provide a smooth surface for better adhesion and vibrant designs.
For more tips and premium supplies, visit our website.